
How to Install a Wireless Alarm

Summary
Example of the contents of an alarm kit
Step 1: Place the opening detectors
Step 2: Place motion detectors
Step 3: Install the other elements in the same way
Step 4: Set the alarm
Alarms are being modernized; they are wireless and integrate new functionalities linked to the advent of new communication technologies. For example, you can control your installation on the Internet and intrusion alert on your cell phone. Traditional equipment has also been improved. Some are equipped with outdoor sirens with flash that signals the house in which the offence is taking place.
Installing a wireless alarm is simple. These alarms essentially combine two protection systems: a motion detector and a detector for opening doors and windows. Typically you will need the following to install the alarm system:
- hardware to install a wireless alarm,
- an Alarm package $1,300 approx.,
- a pencil $0.50,
- tape measure starting at $4,
- drill from $30,
- screws from $2 per bag
- pegs starting at $1 per 25
- Phillips screwdriver starting at $3
Example of the contents of an alarm kit
The alarm kit includes :
- The telephone transmitter: to be placed next to a telephone jack and the ADSL box/modem.
- The indoor siren: to be placed in the house’s center for better sound propagation, height, and challenging to access areas (stairwell, for example).
- Outdoor siren: to be installed on the house’s façade visible from the street, at a height and in a place difficult to access.
- Opening detectors: to be installed on the front door, windows and doors.
- Motion detectors: to be placed in corridors and rooms.
- Keypads: to be installed at the entrance of the house.
Note: from now on, the elements are very often powered by batteries. Their location is difficult to access and can only be opened by unscrewing the case.
1. Place the opening detectors
Installing a wireless alarm starts with installing detectors, which consist of 2 parts: the sensor and its magnet holder. They must be perfectly aligned between the 2 marks.
- Trace the screw locations.
- Install the shim(s) on the magnet holder.
- Screw the detector’s bases and the magnet holder by making close holes or by pegging if necessary.
- Close the cover.
- Test the opening detector:
- Press the button.
- Open the door, window…
The red light should come on and beep.
2. Place the motion detectors
- Continue installing your wireless alarm with the placement of motion detectors that must be fixed at 2.30 m from the ground.
- Using a pencil, trace the holes for the detector location.
- Drill and dowel the holes if necessary.
- Screw the motion detector in place.
- Close the cover and test the motion detector.
3. Install the other components in the same manner
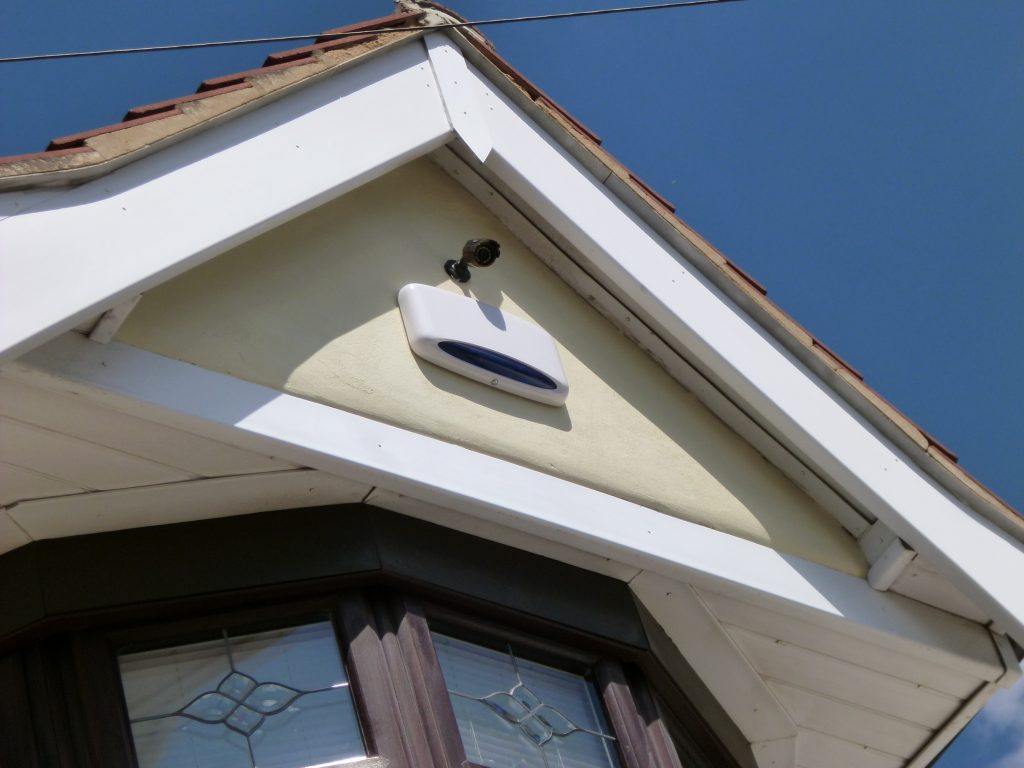
- To install the outdoor siren, keypad and control box, proceed as in step 2.
- Use a pencil to mark the location of the holes.
- Drill and peg if necessary.
- Screw the component securely.
- Test the hardware for proper operation.
4. Set the alarm settings
The alarm setting is done on two supports:
- A parameter setting on the Internet: a control box is then connected to the internet network.
- A parameter setting on the numerical keypad.
You are now done with installing your alarm. If you wish to contact a professional, we can put you in touch with one or more specialists in your area. Please, remember to share your comments in the section below.
1 thought on “How to Install a Wireless Alarm”